Tuesday, March 30, 2010

Easter Cuties

Wow, I've been gone such a long time I hardly even know how to post LOL.
This is nothing new to most of you but I had to try making a little chick out of the Mini Milk Carton Die Cut (117310) for the Big Shot shown in the Occasions Mini Catalog on page 23. This was really so easy to do. All you need is the Mini Milk Carton Die for the base. You cut off one of the edges and the tab on the side, so when you put it together you have an opening at the top to put lots of "goodies" in. (did you notice the chocolate eggs?) I used the Scallop Oval punch for his comb on the top of his head, the scallop circle punch for the wings, the 3/4" square punch for his beak, the 3/4" circle punch for the white of his eyes, and the 1/2" punch for the black pupils. The Modern Label punch was used for his feet (just punch and cut in half). I had trouble getting the ribbon handle to be less than wimpy, so I cut a very thin piece of cardstock and attached the ribbon to the cardstock before I attached it to the "basket". I keep saying "his", but I don't think "he " would be very happy with a bow on his head, so in your mind, change all my "his" or "him" to "she" and "her".
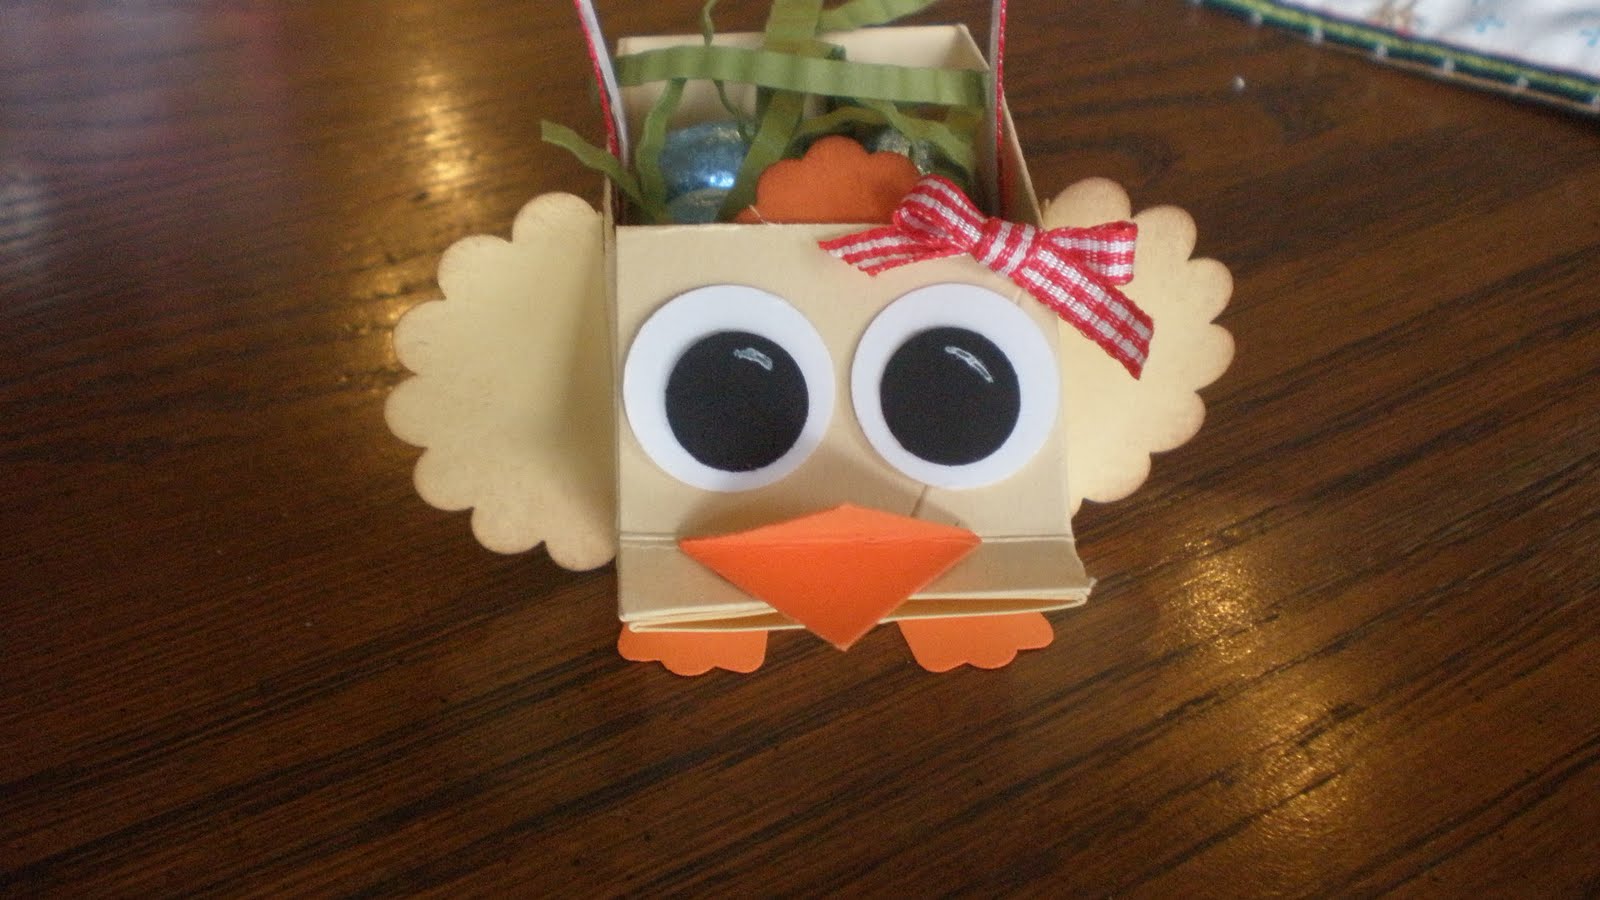
Isn't she sweet? Try making your own and send me a link to see what you have done.

Thursday, February 25, 2010

Another Attempt at the Shades of Spring DSP

I decided to try again with the Shades of Spring DSP using some brighter colors. I like it better, it's a different card, but I like the darker complementary colors.

On this card I used Handsome Hunter for the main card; I hardly EVER use this color, but it really complements the Orchid Opulence and Pale Plum colors; even the So Saffron and Crushed Curry. I was surprised; I would never have thought these would even go together.

This is pretty easy to follow, I laid down the Shades of Spring DSP and the So Saffron on the top. Then I punched some Crushed Curry and some Orchid Opulence with the new Scallop trim Border, layering them so you can see both colors peep out. I attached some 1/4" Eggplant grosgrain ribbon arund the top of the Crushed Curry. then I stamped the Friends stamp from Vintage Vogue on some Whisper White Cardstock and then again. I cut out one of the "F"s and attached it over the top of the other one using dimensionals. then this was attached to a piece of Handsome Hunter cardstock which was then attached to the card using dimensionals.

Have a Wonderful Friday

Wednesday, February 24, 2010

Attempt at Mojo Monday

I thought I would give Mojo Monday a shot using the new Shades of Spring Designer Series Paper from the Occasions Mini Catalog. I think I needed to use some deeper colors; this is just a bit too pastel for my taste, but I thought I would give it a try.
I used the new DSP and added some So Saffron at the top. The card base is certainly celery. Maybe I should have pulled out my color wheel for some "complimentary" colors :)
I did use the new Happy Moments Stamp set and Teeny Tiny Wishes for the Greeting which I love.
Have a nice Wednesday

Tuesday, February 23, 2010

I love the Sweet Pea Designer Series Paper so much; it's so fun and cheerful and so many choices of colors, patterns. I'll be so sad when it's no longer available.
Anyway, some time back I made a box to hold 3X3 notecards that was so cute, I was thinking I had this really nice 4X4 card that we made at my last club and thought a box to hold four of them would be really cute. It wasn't hard to tweak the size of the box to fit the bigger cards.
The bottom of the box is an 8 1/2" square and scored at 2" all the way around. I cut tabs on each corner and using some sticky strip and snail I adhered the tabs to the sides all the way around.
The lid is a 5 5/8" square and scored at 1" all the way around. Again, you need to cut tabs on each corner, apply some sticky strip and adhesive and fold your lid together. Now you are ready to decorate any way you like. I used the Sweet Pea Designer Series papers and tied the lid down with the new 5/8" Chocolate Chip Satin Ribbon that's in the new Occasions Mini Catalog. These ribbons are only available until April 30th, so if you want some, now is the time or order it. There are 9 different colors and it's so gorgeous and fun to work with.
For the cards I used the Fresh Cut Notes (111882 on page 168 in the 2009/2010 Idea book & Catalog). I stamped a 4X4 piece of chocolate chip cardstock using the Fresh Cuts stamp set and used Craft White Ink ( you have to let this dry for a while as it stays wet for a while). I also punched out a flower from the Three for You punch, pierced a hole in the center of that and the center of the flower in the Fresh Cut Notecard and inserted one of the new Chocolate Epoxy Brads from the Occasions Catalog. Using the Eyelet Border Punch, I punched the edge of the Fresh Cute Notecard, then ran the front of the card through my Big Shot with the new Perfect Polka Dots empressions folder. Then I adhered the stamped chocolate chip piece to the inside of the Notecard and tied a piece of 5/8" Chocolate Chip Satin Ribbon around the card.
Isn't this so cute? What a fun gift for someone.

Monday, February 22, 2010

My Husband's Valentine

I saw the cutest Valentine someone made and I had to try it, but with the paper I used it looks sort of washed out. Basically it's a hinged card, but in the shape of a heart. This was fun to make, but I think if I did it again, I would do some things different. The little card inside the pocket says "Be Mine". Cute heh?

Sunday, February 21, 2010

Another Cake & Frosting Gift Set


Yesterday, I showed you the Valentines Cake/Frosting Gift set. Today, I'm going to show you the set I made for my neighbor who moved into a new house. I decided it would be fun to use the new Welcome Neighbor Designer Series Paper you can get for free during Sale-A-Bration. This is a pad of 72 sheets of 6X6 double sided paper. There are 3 sheets of each design. I also used the new Good Neighbors stamp set from the Occasions Mini to embellish the apron card, and the front of the pocket. stamped and cut out some of the trees and added them to the paper raising them with dimensionals. Did you notice the lace on the apron? I punch the edge of a piece of whisper white cardstock using the eyelet border punch and sponged the edge with Soft Suede Classic ink. Then I sort of munched it up (is that a word), and after putting a strip of sticky strip on the card, I laid the lace on top and tried to scrunch it the best I could. I haven't actually given this to her yet; I hope she likes it. Nothing like a cake or cupcakes baked in your new home, right?

Saturday, February 20, 2010

Cake Mix Gift

I finally got around to trying out the Cake Mix & Frosting Gift set and have fallen in love with it. I've found that it's so versatile and can be used for ANY occasion. The ones I've seen up to now have all been for birthdays, but I made one for my daughter for Valentines Day that turned out really cute. I used some fun new products on this project and some old ones that I haven't used a lot. Don't you love the new Scallop Trim Edge Punch? It really dresses up a card. I also used the I (heart) Hearts stamp set from the Occasions Mini Catalog and punched them out using the Heart to Heart punch. I also had fun using the new Full Heart Punch and the new Embossed Heart from the Occasions Mini. I haven't used the Defining your Life and Defining Alphabet stamps much, but it worked well for this project.
Tomorrow I'll show you the set I made for my neighbor who moved into another subdivision into a new home.