Saturday, July 31, 2010

Convention Make & Takes

During convention we get to make some really fun projects..... I'll show you a few today and more tomorrow... This first card is really pretty... and simple to make. It's a 3X3 card and using a 2 1/2" circle template we sponged Daffodil Delight, Peach Parfait and Pear Pizzazz classic
inks. Then using the stamp from "Just Believe" we stamped in Early Espresso Ink, stamped off and then stamped on the card. Again using another stamp from the "Just Believe" set, we stamped the greeting in Early Espresso and stamped in the circle and over the flower image.


The next project is really cute. There are three 3X3 cards and a holder made from a Small Open-End Whisper White envelope. We cut the envelope across a long edge, then licked the flap to close the envelope. We folded the envelope in half, then using a 1" circle punch, we punched in the center of each square of the fold at the top to easily remove the cards and envelopes that will be put inside. This project is using a new single stamp "So Many Thanks". You can see that we used the Stampin' Write Markers to color the stamp... the work Thanks is colored in Marina Mist, the hearts in Real Red and the "so much" in Daffodil Delight. The greeting attached to the envelope is set up on dimensionals, so then we threaded a piece of Daffodil Delight 1/4" grosgrain ribbon through and around and tied in a bow. Pretty cute, huh?


This next card is really simple. The stamp set used is "Paisley Prints" and the "thanks" is from the So Many Thanks single stamp used above...
We pierced holes at the top of the Peach Parfait strip and attached both the Peach Parfait and the Pear Pizzazz cardstock to the Soft Suede Cardstock base. Using the Paisley Prints stamp set, we stamped the heart using Versa Mark onto Pretty in Pink cardstock and punched out using the Full Heart Punch. The heart is attached to the card with dimensionals. A little flower punched with the itty bitty shapes punch was attached using a mini glue dot and a small adhesive backed pearl. Also the word "thanks" from the So Many Thanks stamp set was inked with a marker and stamped onto whisper white card stock and punched out using the Jewelry Tag Punch. The tag was attached with a mini glue dot along with a bow tied with Linen Thread.

Have a Good Day

Friday, July 30, 2010

Convention Swap


Isn't this the cutest little purse ever???? My upline made these cute little purses with CHOCOLATE inside for our group swap on Thursday at Convention. I told her "after 5 years" that during all the time I was stamping with her before I joined as a Demonstrator that "EVERYTHING" we made that had chocolate or other candy in it......... STILL has the candy in it. I can't bear to take the projects apart...... they all have a memory and are a good "sample" for future use. Everything we made is packed away safely LOL.

Did you notice the pretty glittered butterfly on the front? That was made using the Beautiful Wings Embosslit die.
Have a Great Day!!!

Thursday, July 29, 2010

Presto Patterns Paper

I saw the new tutorial from Splitcoast Stampers for Smooch Spritz and thought I'd try it. I made it using the same colors they did; Pacific Point CS and Ink and the Presto Patterns Paper. I sponged Pacific Point ink heavy in some spots and lighter in others onto the Presto Patters Paper. Then I sprayed the gold Smooch Sprits onto the paper and sponged it around. It's really nice with the gold glittery look over the Pacific Point Blue. I stamped the word "Imagine" from the stamp set "Word Play", but you can't really see it; next time I will use a different ink or probably emboss it so it stands out better. I attached the Presto Patterns Paper to a piece of Pacific Point that was already cut out using the Top Note Die. The white cardstock underneath, was made using the Big Shot and the new Vintage Wallpaper embossing folder and sponged lightly over with Pacific Point Classic Ink. I cut down the normal size of the white cardstock so it would fit onto a piece of 8 1/2" X 5 1/2" Pacific Point cardstock. I also corner rounded the bottom of the white CS and the Pacific Point cardstock. Using up some of my pretties kit that has retired I attached several silk flowers on the side; some with the little stems on them and several without. The flowers without the stem, I attached a few sticky back rhinestones. I decided that wasn't blingy enough, so I then Smooch Spritzed the Whole card using the Vanilla Shimmer then I dusted on some Dazzling Diamonds.
Have a Nice Day!!!!

Wednesday, July 28, 2010

Back from Convention

Convention was such a blast this year and there are so many new PRODUCTS that will be available starting with the New Holiday Mini Catalog due to launch on September 1st. You will be so excited to see what is new!!!

Here are a few pics from Convention 2010

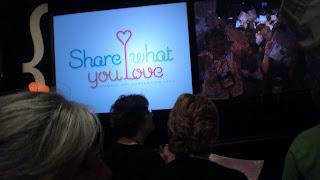
This was our Theme This Year - Share What you Love.....


This is a photo of "most" of our group, but certainly not all because we had 14 or 15 just from our Boise, ID area.


This is Britiney Slaughter, "dancing" to the music!!


Carrie Rhoades with her daughter Hannah. Hanna was such a little angel, you didn't even know she was around she was so quiet and well behaved.


Pat Dion & Erlene Kuntz.... turns out they are from the same town and high school back in Montana.

These girls are from the Charley Jenkins band (that's me in the middle). They were so great. I have a picture with Charley Jenkins too, but by the end of the evening my camera battery died, so someone else took my picture with him and is going to send it to me soon.


This little Cutie is also with the Charley Jenkins band. she played the fiddle and they announced that she is currently also on America's Got Talent..... I may have missed her since I haven't seen her yet... maybe she's still up-coming.


Our group of Stampers from "Stampadelicious" met at lunch on Thursday during convention and had a private swap between just us. We also did a quick make & take. I made these cute little purses designed by Becky Roberts. I think they are absolutely the cutest and I also made cute little 3X3 notecards to go inside.


Have a GREAT Wednesday!!!

Tuesday, July 20, 2010

CONVENTION, Here I come!!!!!!!

So excited....... I leave for Convention on Wednesday morning... I've been working for several days on a "WOW" swap for my Demonstrator Group. I'm really excited about what I came up with; but I can't show you now, someone might see it before I UNVEIL it on Thursday. This year seems so more exciting than the past with all the new colors and accessories and "products" that I can't wait to see what they have to show us.......... so I can show 'you'. Tomorrow I need to get things ready and pack as I leave early Wednesday morning.......
This is a swap card I made for our demonstrator group meeting last week. I absolutely LOVE this new Owl Punch. Every piece of the owl is included in this punch, you just need to punch several different colors and DSP to make him really pop out. On this card I also used the bird punch for the branch he is sitting on. Everything on this card is using new stuff (except the bird punch). The greeting is in the new perfect punches set. The ribbon is the Poppy Parade stitched poly ribbon; the DSP is Sunny Garden, the returning Wild Wasabi Cardstock, the new Dotted Scallop Ribbon Border Punch and the cardstock base is also Poppy Parade. I really love this new color. Did you notice the NEW 2 2/3" scallop /circle punch???? Love it.
When I get back from Convention on Saturday night, I will share some of the fun stuff we did, pictures, and new ideas........ Until then, have a nice rest of the week.

Sunday, July 11, 2010

Owl Punch

Have you purchased the new Owl Punch yet? OH MY GOSH!!!!!!, it's one of the cutest things I've ever seen. All the pieces are included in "one" punch; but you need to punch in different colors to get the desired look. There are actually 9 (can you believe it) pieces in this two step extra large punch. I only punched a few scraps I had on my desk, but I need to actually use some designer paper and really cutesy this up a bit and use it on a final project. You are going to see this owl in a lot of projects I create......... I am so excited about this new addition to the Stampin' UP! Idea and Catalog!!
Maybe tomorrow, I will have something put together showing how cute this is on a card!
Enjoy your Monday.

Tuesday, July 6, 2010

Color Renovation Kits

As you already probably know, Stampin' UP! has introduced lots of new core colors and has brought back some previous in-colors and has new In-Colors for 2010. To help you update the base core colors and new in-colors, Stampin' UP! has made it easy for you and is offering Color Renovation "Kits". Click on the attached link to see how easy it is to replace the retired colors with new colors. I am really excited about the color change even though it meant I lost a lot of colors and cardstock...... the new colors are so vibrant and outstanding!!!

To place an order for these updates, either order on-line at my website http://www.janetelam.stampinup.net/ or call or email me.

http://www.stampinup.com/us/documents/ColorRenovationKits_0610_USnoCTA.pdf

Sunday, July 4, 2010

Giraffe Invitation

A while back Carrie Rhoades posted a Giraffe Punch Art Card; I thought it was so cute I made one just like her's for my Grandson. Before I sent it though, I took it to work for "show and tell". Anything I thought was different and outstanding I would take to work to show others. One of the girls liked it so well, she asked me to make her son's birthday invitations like Carrie's card. Oh my gosh........ there are so many pieces and parts to put these together. She needed 18 cards. So, here's the work in progress and the final piece of ART!!! I hope she likes how they turned out. They really did turn out cute!!!

Saturday, July 3, 2010

Another Card and Bag Topper

I previously showed you some cards and Treat Bag Toppers that a friend asked me to put together for an event she was having; then she asked me to have a class for thes one she did not pick for the event. We had our class this week and made the previous ones I showed you and the one here. I thought the Little Umbrella for this Tropical Party set was so cute and it's so easy to make. I found it shown on another website, but don't know now where it came from. You take a 4 X 4 piece of designer series paper and fold it like an accordian. Mine is approximately in 1/2" folds. When that is done, you fold it in half and using mini glue dots, you attach the two sides together making a "fan". I then attached a toothpick to the edge of the fold and then some more on the outside edge so I could attach it to my topper. Before I saw that I was actually thinking about buying some of those cute umbrellas you put in drinks..... this was much more economical. Unfortunately, the card was totally cased. Didn't this turn out cute..... Everyone had fun making these; I think the candy in each bag was the big "hit" lol
Have a nice weekend!!!

Friday, July 2, 2010

IT'S A NEW YEAR

Yes, at Stampin' UP! it's a new year, with a Brand New Catalog and Idea Book effective 7-1-10. The book is GORGEOUS this year with so many new vibrant colors and papers; it's a nice change. Just click on the catalog and check out all the new stamp sets, colors, accessories available. If you see something you like, you can either call or email me or go online to my Stampin' UP! website http://www.janetelam.stampinup.net/ and order direct from there and have your order shipped directly to your home.
There's also a new Definitely Decorative Catalog with lots of new images to decorate your home or other projects. Again, just click on the catalog to view it.
Have fun shopping!!!!